Introduction to Web Hosting
Web hosting is a service that allows individuals and organizations to make their websites accessible on the Internet. It plays a crucial role in running a website by providing the necessary technology and infrastructure to store and deliver web content. At its core, web hosting involves the allocation of server space, bandwidth, and storage to host a website so that users can access it anytime from anywhere.
Servers are powerful computers that store all the data and files necessary for a website to function. When users type a web address into their browser, the server delivers the requested web pages to their devices. Bandwidth refers to the amount of data that can be transferred between users and the server at any given time. It dictates how quickly and efficiently users can access and download website content. Meanwhile, storage pertains to the amount of space available on the server to store a website’s files, including text, images, videos, and databases.
Web hosting providers play an essential role in managing and maintaining these components. These companies offer a range of hosting plans tailored to different needs, from small personal blogs to large e-commerce sites. They also provide additional services like security measures, technical support, and software updates to ensure websites run smoothly and efficiently. Choosing a reliable web hosting provider is vital, as it affects the website’s performance, loading speed, and uptime, which in turn influences user experience and search engine rankings.
In summary, web hosting is fundamental to the operation and accessibility of a website. By understanding its importance and the various elements involved, individuals and businesses can make informed decisions when selecting a web hosting service that meets their specific requirements.
Different Types of Web Hosting
When delving into the realm of web hosting, it is crucial to understand the different types available to make an informed decision. The various types include shared hosting, VPS (Virtual Private Server) hosting, dedicated hosting, and cloud hosting. Each type comes with its unique features, advantages, and disadvantages, suitable for distinct use cases.
Shared Hosting is a popular choice among beginners and small websites with limited traffic. This hosting service involves multiple websites sharing the same server resources, making it a cost-effective option. The primary advantage of shared hosting is its affordability and ease of use. However, it comes with drawbacks such as limited resource allocation and potential performance issues due to the behavior of neighboring websites. Shared hosting is ideal for personal blogs, portfolios, and small business websites that do not require extensive resources.
VPS Hosting provides a middle ground between shared and dedicated hosting. In this arrangement, a physical server is partitioned into multiple virtual servers, each with its own set of resources. VPS hosting offers better performance, customization options, and control compared to shared hosting, without the high cost of dedicated servers. This type of hosting is suitable for growing websites with moderate traffic, e-commerce sites, and developers needing a customizable environment. However, technical knowledge is often required for effective management.
Dedicated Hosting involves leasing an entire physical server exclusively for one website. This type of hosting guarantees unparalleled performance, security, and control. A dedicated server is capable of handling high traffic volumes and resource-intensive applications. The downside is its high cost and the need for technical expertise to manage and maintain the server. This option is best suited for large businesses, popular blogs, high-traffic websites, and enterprises requiring robust performance and security.
Cloud Hosting is an innovative approach, leveraging multiple interconnected servers to host websites. This architecture provides enhanced scalability, as resources can be adjusted according to traffic demands. The key benefits of cloud hosting include flexibility, reliability, and cost-efficiency, as users pay only for the resources they use. However, potential disadvantages include variable pricing and data privacy concerns. Cloud hosting is an excellent choice for startups, rapidly growing websites, and projects requiring variable resource allocation.
How to Choose the Right Web Hosting Plan
Choosing the right web hosting plan is crucial for the success of your website. The first step in this process is to determine the size of your website and its technical requirements. A small personal blog will have different needs compared to an e-commerce site with hundreds of pages. Assess the amount of storage space and bandwidth you’ll require to ensure smooth operation.
Another important factor is expected traffic. Websites with higher traffic need more robust hosting solutions to handle the increased load. Shared hosting plans may be sufficient for small websites with low traffic, but as your audience grows, you may need to consider Virtual Private Servers (VPS) or dedicated hosting to maintain performance and speed.
Budget is another critical consideration. Hosting plans come with various price points and features. It’s advisable to compare different hosting providers and their plans to find one that offers the best value for your specific needs. While it’s tempting to go for the cheapest option, more expensive plans often offer better performance, support, and security features.
Scalability is also a significant aspect to consider. Your web hosting plan should accommodate future growth. It’s prudent to select a host that allows you to upgrade your plan easily as your website expands. Otherwise, you might face issues with downtime or slow performance, which can adversely affect user experience and SEO rankings.
Customer support and uptime guarantees are vital elements to evaluate when selecting a web hosting provider. Look for hosts that offer 24/7 customer support to resolve any issues promptly. Additionally, uptime guarantees of 99.9% or higher ensure that your website remains accessible to users nearly all the time, minimizing potential losses in traffic and revenue.
Security features must not be overlooked. Verifying that the web hosting provider has robust security measures, including SSL certificates, regular backups, and protection against Distributed Denial-of-Service (DDoS) attacks, will safeguard your data and maintain the trust of your visitors.
Registering a Domain Name
Registering a domain name is a crucial first step in establishing an online presence. A domain name functions as your website’s address on the internet, facilitating easy access for users. Its significance cannot be overstated, as a well-chosen domain name can contribute positively to your brand’s recognition and memorability.
When selecting a domain name, aim for simplicity and relevance to your content or business. An effective domain name is typically short, easily pronounceable, and free of complicated spelling. Including keywords related to your niche can also enhance search engine optimization (SEO). For instance, a bakery might consider something like “deliciousbakes.com” – simple, relevant, and keyword-rich.
Once you’ve brainstormed potential names, the next step is to check for their availability. Numerous online tools and domain registrars facilitate this. Popular registrars include GoDaddy, Namecheap, and Bluehost. These platforms offer user-friendly interfaces to see if your desired name is available, and often suggest alternatives if it’s taken.
Understanding different domain extensions or top-level domains (TLDs) can also bolster your decision. While “.com” is the most common and globally recognized, there are numerous other options like “.net”, “.org”, “.biz”, and country-specific extensions such as “.uk” or “.de”. Selecting an appropriate TLD can influence user perception and trust. For a non-profit organization, “.org” might be more fitting than “.com”.
To register your chosen domain name, follow a straightforward process on a domain registrar’s website. First, create an account with your selected registrar. Second, use their search tool to enter your desired domain name and confirm its availability. Once identified, add it to your cart. Proceed to checkout, where you’ll need to provide necessary details like your contact information. Pay the registration fee, which varies based on the registrar and TLD. Typically, registrations are yearly, but many registrars offer multi-year options.
Successfully registering a domain name grants you ownership and control over that specific web address, marking the first major milestone in creating your web presence.
Setting Up Your Web Hosting Account
Once you have selected a suitable web hosting plan and registered your domain, the next crucial step is setting up your web hosting account. This process may seem daunting to beginners, but by following a structured approach, you can successfully configure your hosting environment. Most hosting providers offer a user-friendly control panel, often cPanel or Plesk, to simplify these initial configurations.
Firstly, you will need to sign up with your chosen hosting provider. Look for a verification email sent to the address you used during registration. This email typically includes your account details, login credentials, and instructions to access your control panel. Upon logging in, you will be prompted to change your initial password for security purposes.
Next, you should familiarize yourself with the control panel. Start by locating the domain management section. Here, you can add your registered domain if it hasn’t been automatically added during the sign-up process. If you have multiple domains, you can also add them at this stage. Look for the option labeled “Addon Domains” in cPanel or “Domains” in Plesk to manage additional domains.
Setting up email accounts is another essential task. Navigate to the ‘Email’ section in your control panel. Here, you can create new email accounts associated with your domain. For instance, you might want to create addresses like info@yourdomain.com or support@yourdomain.com. Configure mailbox quotas and set up email forwarding if necessary.
There are other configurations to consider as well. For example, you might want to upload a website file using the ‘File Manager’ or set up an FTP account for easier file transfer. You can also configure databases through the ‘Databases’ section, essential for running many types of websites, especially those using content management systems like WordPress.
By following these steps methodically, you will be well on your way to a fully functional hosting environment. Always refer to your hosting provider’s documentation or seek support if you encounter any issues.
Uploading Your Website Files
Uploading your website files to the web host is a critical step in making your site accessible on the internet. There are several methods available to achieve this, each catering to different levels of technical proficiency and specific needs. The most common methods include File Transfer Protocol (FTP), Secure File Transfer Protocol (SFTP), and web-based file managers provided by hosting services.
FTP and SFTP are popular choices due to their reliability and ease of use. To use FTP, you’ll need an FTP client such as FileZilla or Cyberduck. Begin by downloading and installing your preferred FTP client. Open the client and enter your web host’s FTP server address, username, and password. Once connected, you will see a two-pane interface; the left pane shows your local files, while the right pane displays your web host’s files. Simply drag and drop your website files from your local machine to the web host to upload them.
SFTP operates similarly but offers enhanced security by encrypting the file transfer, making it the preferred option for sensitive data. The setup process mirrors FTP: using an SFTP client, you’ll need the server address, port number (usually 22), and your credentials. Once connected, you can drag and drop files to transfer them to the web host securely.
For those who prefer not to use FTP/SFTP clients, most web hosting services offer intuitive web-based file managers accessible through your hosting account’s control panel. This method may be less complex for beginners, as it eliminates the need for external software. Simply log into your hosting account, navigate to the file manager, and use the upload function to transfer your website files directly.
If you are using a Content Management System (CMS) like WordPress, the process is even more straightforward. Many web hosts provide one-click installations for popular CMS platforms. Once installed, you can easily upload themes, plugins, and additional files directly via the CMS dashboard. This method is ideal for beginners due to its simplicity and the extensive online support communities available.
By understanding and utilizing these methods, you can seamlessly upload your website files to your web hosting service, bringing your website one step closer to being live on the internet.
Managing Your Web Hosting and Website
Managing your web hosting and website is an ongoing process that requires attention to several critical aspects to ensure smooth operation and optimal performance. One of the primary tasks is regularly updating website content. This involves adding new posts, editing existing pages, and ensuring all information is current. Effective content management ensures your website remains relevant and engaging for your audience.
Another crucial aspect is managing databases. Websites often rely on databases to store essential information. Regular database maintenance, including optimization and cleaning, is essential to prevent performance issues and data corruption. Using the hosting control panel, typically provided by your web host, simplifies these tasks. The control panel offers various tools for managing databases, email accounts, and other resources associated with your hosting plan.
Backups are vital for any website. Regular backups protect your data from unforeseen events such as server failures, cyber-attacks, or accidental deletions. Many hosting providers offer automated backup services, which you should enable. Additionally, consider maintaining manual backups periodically to ensure data redundancy and quick recovery in adverse situations.
Monitoring website performance is another essential component of web hosting management. Utilizing performance monitoring tools helps track key metrics such as load times, uptime, and server response times. Continuous monitoring allows you to detect and resolve issues promptly, ensuring a smooth user experience. Regular performance auditing also helps identify areas for improvement, contributing to your website’s overall growth.
Routine maintenance, such as updating software, plugins, and themes, is vital for security and functionality. Outdated software can have vulnerabilities that cybercriminals exploit. Therefore, regularly applying updates and patches is necessary to safeguard your website from threats.
Implementing robust security practices further fortifies your website. This includes using strong, unique passwords, enabling two-factor authentication (2FA), setting up a firewall, and regularly scanning for malware. Proactive security measures help prevent unauthorized access and ensure the integrity and safety of your website.
By diligently managing these aspects, you can maintain a well-functioning and secure website, providing a positive experience for your visitors and protecting your online presence.
Troubleshooting Common Web Hosting Issues
For beginners in web hosting, encountering problems such as downtime, slow website performance, and email issues is fairly common. Understanding these issues and knowing how to troubleshoot them can significantly improve your hosting experience.
Downtime is when your website becomes inaccessible. This can be caused by server issues, scheduled maintenance, or even DDoS attacks. To troubleshoot downtime, first, check your hosting provider’s status page or social media for any announcements about outages. Use online tools like “Down For Everyone Or Just Me” to confirm the issue. If it’s an ongoing problem, contact your hosting provider’s support team with specific details about the timing and frequency of outages.
Slow website performance can negatively impact user experience and SEO rankings. Common causes include high traffic, excessive plugins, or unoptimized images and code. Begin by checking your website’s speed using tools like Google PageSpeed Insights or GTmetrix. Optimize images, leverage browser caching, and reduce the use of heavy plugins. Consider upgrading your hosting plan if you frequently experience high traffic levels.
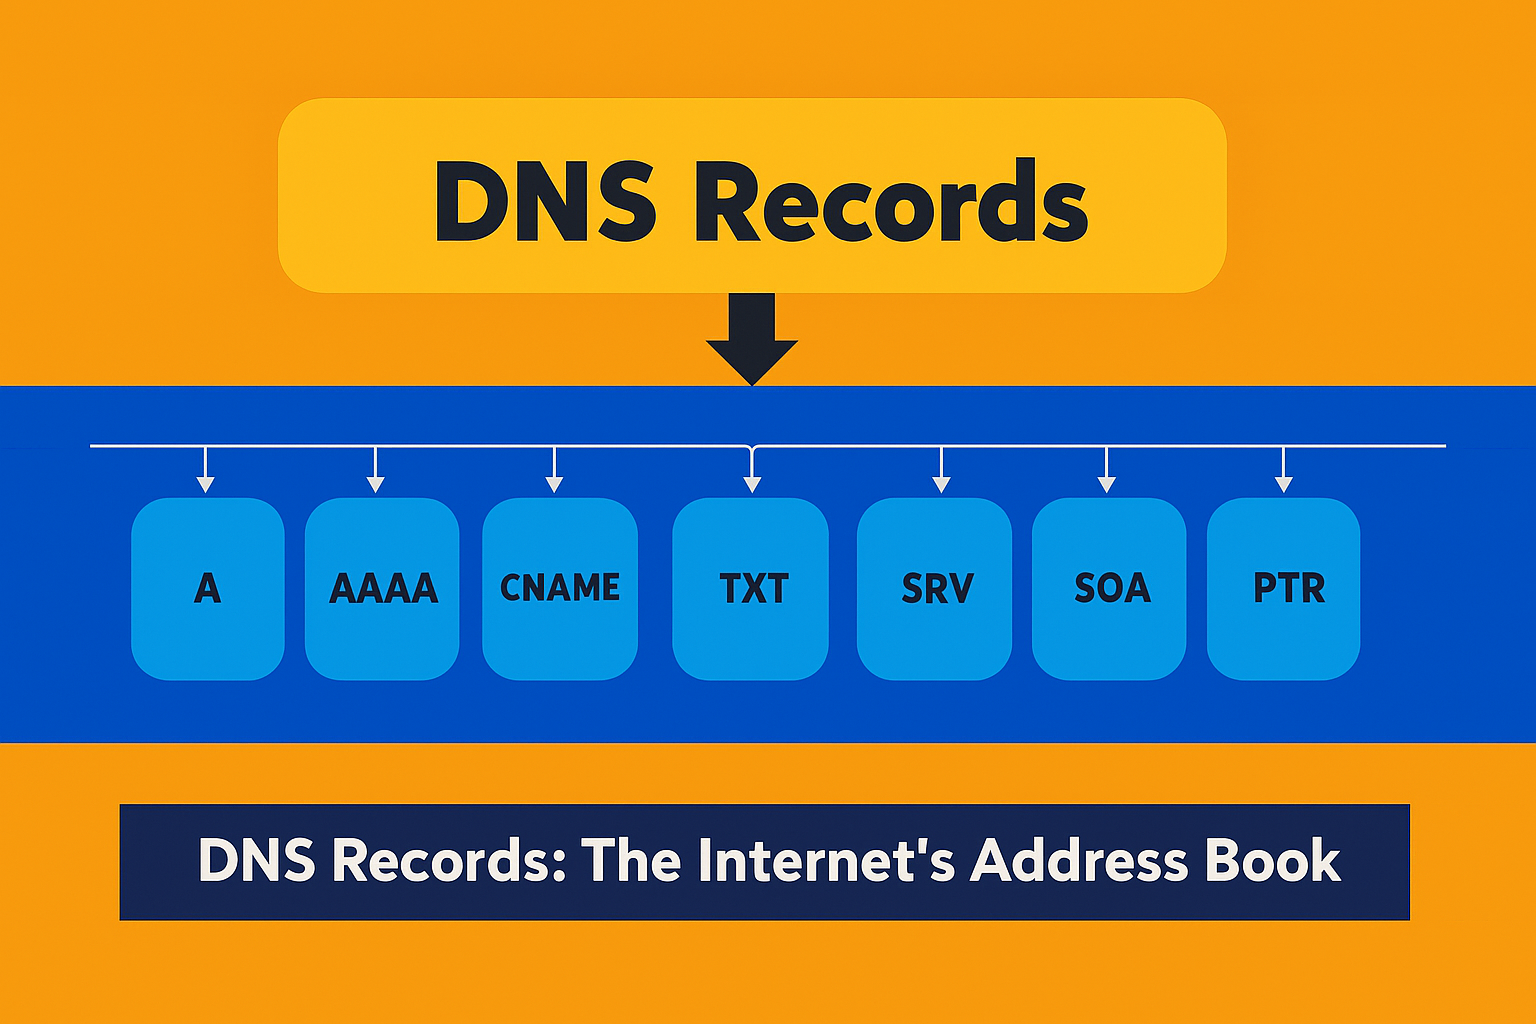
Email issues are another headache for web hosting beginners. Problems can include emails not being sent, delivered, or marked as spam. Ensure your DNS settings, specifically the MX records, are correctly configured. Check email client settings and spam filters or consider using professional email services like G Suite or Office 365 for more reliable email hosting. If the issue persists, contact your hosting provider for advanced troubleshooting and ensure to provide clear descriptions of the error messages or behaviors you are experiencing.
Knowing when to seek help is crucial. If you’ve exhausted basic troubleshooting steps or if issues are beyond your technical understanding, reach out to your hosting provider. Be specific and concise in your communication, detailing the problem, any error messages, and troubleshooting steps already taken. This helps the support team diagnose and resolve the issue more efficiently.
By effectively identifying and addressing these common web hosting issues, beginners can ensure a smoother and more reliable hosting experience.


0 Comments